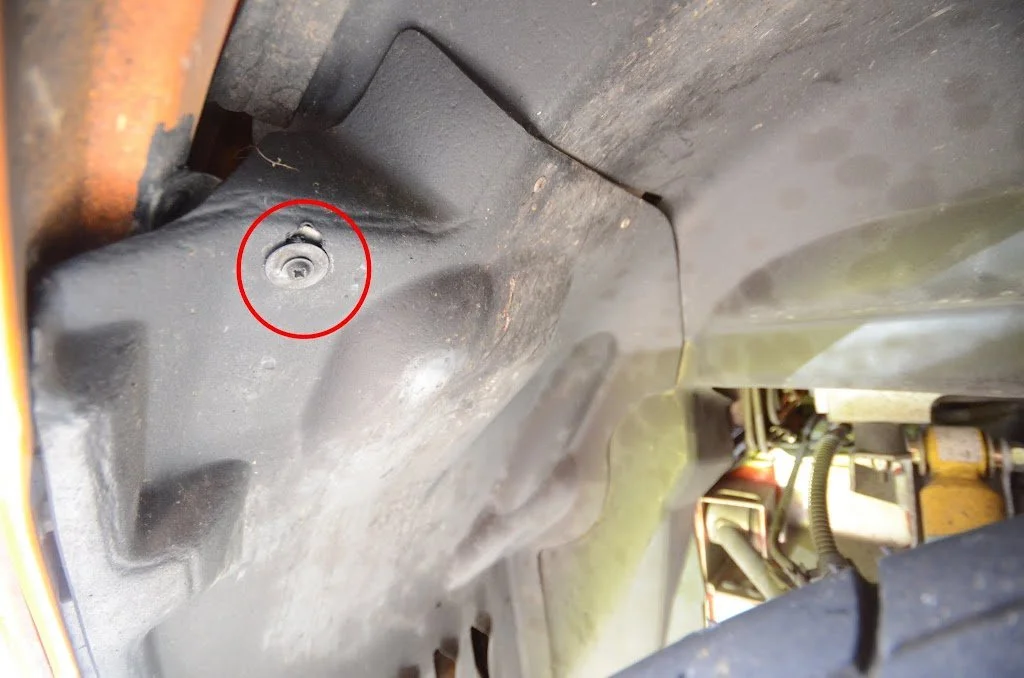
Remove lower screws and clips for front fender liner behind oil cooler
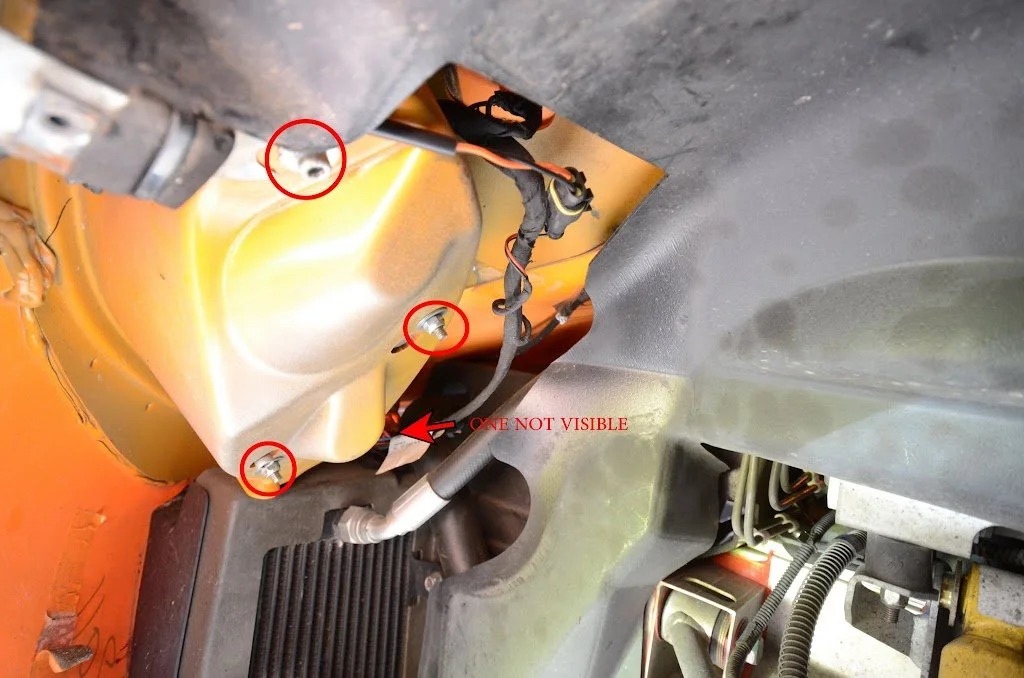
Remove upper screw on inner fender and remove the front fender liner
Remove 3 Allen bolts that attach the headlight cover then remove the 3 10mm locknuts that hold the headlight assembly
Headlight cover removed
Disconnect all wires going to the low beam, high beam and indicator light in high beam reflector. Remove headlight assembly. It may be slightly stuck to the headlight bucket but be careful not to damage anything.
Here is a picture showing the headlight assembly removed from the car
Use a flat head screw driver to remove clip that holds on the lower adjustment bolt
Here it is removed (save this clip it is very important)
Remove the two upper screws holding the OEM projector assembly
It takes a little bit of wiggling and moving the projector around but it does come out of the bracket
Remove the black plastic socket from the adjustment screw on the OEM projector
Using a set of small vice grips clamp onto the base of the screw very tightly. You may damage a few threads at the bottom but they will not ever be used. We have found that the nut is locktited onto the threads so just a phillips head screw driver cannot provide enough torque to break it free. Remove the nut with an 8mm wrench or socket.
Here is the hardware you must save from the OEM projector that will be reused
Here is half of the hardware including what comes in our kit (enough for one headlight) and the OEM hardware to be reused
The kit comes with (for one headlight, you should have two packets of hardware and one packet of machined aluminum parts): (4) M4 screws (1) Adjustment screw (1) upper projector bracket (1) lower projector bracket
Install the lower bracket in the holes shown using the M4 screws provided (notice the location of the highbeam solenoid).
Keep these screws slightly loose.
We have noticed some of the holes may have some flashing from the injection molding process. This can be cleaned out easily by putting the point of the phillips head screwdriver in the hole and twisting.
Thread OEM adjustment bolt into bracket as shown for the Left Hand side of the car (as the driver sees it). Thread into other hole in bracket for the Right Hand side headlight.
*Ignore the spacers, those are from the HID Projector kit and does not apply to the LED Projectors.*
Thread on adjustment nut as shown. Make sure this is very tight. A new application of loctite is probably a good idea but not required
Mount upper projector bracket onto the headlight assembly using the OEM screws you saved
Screw new projector assembly to upper bracket, also install black plastic socket and install into hole in assembly
Using pliers, re-install clip onto socket and get it as tight to the bracket as possible
Bolt assembly back into clam with the three 10mm lock nuts that are secured from the bottom
Next, plug in the built in ballast to the factory harness along with the factory high beam wiring to the supplied adapter harness.
Now its time to align the headlights!
First thing you want to do is to see if the headlights are approximately aimed. You want the beam coming out of the headlights almost horizontal or slightly down. We checked the alignment of the factory headlights against our garage wall to start and marked it. This may or may not be where you actually want them but its a good place to start.
Set the height of the cutoff using screw #3.
Now place the factory headlight cover over the assembly and make sure it seats properly. Due to the disassembly and the variation of fit from car to car we have found some minor adjust of the main headlight bracket may be needed. I have shown arrows where you can lightly apply pressure either forward or backwards to get the projector assembly to fit correctly to the opening in the headlight housing.
Each time you adjust the entire assembly go back and set the height of the beam pattern again using screw #3 before checking the fit of the headlight cover.
Once you are satisfied with the fit then you can use screw #1 to adjust the headlight right or left as needed.
On only one of our test cars we found that screw #2 was adjust quite far out. We needed to adjust this slightly using a short phillips to get the fit correct.
Re-install the headlight covers and double check how the lights are aimed, tightening these screws can tweak everything slightly because the headlight bucket flexes a bit.
Re-install the inner fender liner and you are done!
(I am sure I may have missed something but I will keep updating with more information and pics as any questions arise)